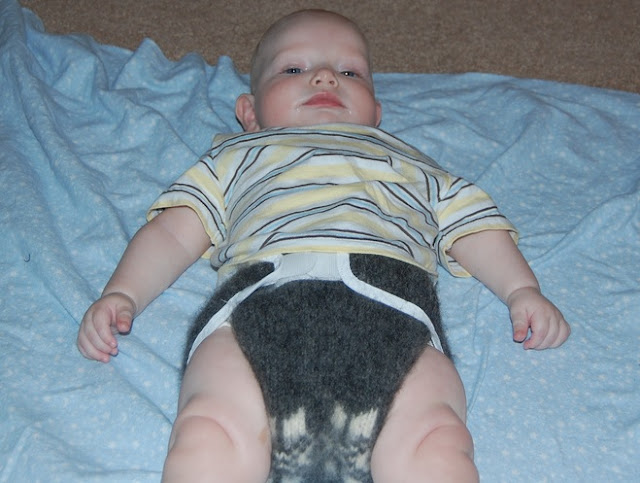
You could test your baby's used wool covers for waterproofness, by dribbling some water on them.
If the water beads up, they are still good.
If the water spreads out or soaks in, you need to re-lanolize them.
To do this, you need to get some Lanolin, (you don't have to pay the $$ for Lansinoh).
 |
| Anhydrous Lanolin Pharmaceutical Grade |
Pour the water and dissolved Lanolin into it, then put the covers in.
Squeeze the covers to get the Lanolin to penetrate.
Then squeeze the water out, and lay flat to dry.
You might also want to put a bit of baby shampoo in the water, to clean them.
I am not a lanolizing expert, so I am not sure if the shampoo would have any effect on the lanolin being effective... anyone else knows?
 |
| Eucalan No Rinse Delicate Wash |
Another option: I use Eucalan, which is a special wool wash which already has lanolin in it.
You can add additional Lanolin, which I recommend for the first wash since they are gently used.
Then every so often, maybe every month or two.
Thanks to Scarlet for this frugal baby tip!

Have you got a funny baby who loves to turn off your computer, right in the middle of your work or writing?
If the front of your computer is flat, you can protect it with a sheet of plexiglass and some sticky-back Velcro® dots!
Just get a small piece of plexi-glass or even a plastic bread board - say about 5" by 7" (or to fit your computer) - and six Velcro® dots.
Place one side of the Velcro® dots at each corner of the plexi-glass or bread board, and one in the centre of each longer end.
Next, place the other side of the Velcro® dots on the coordinating spot across the front of your computer, covering up the
ONbutton. Line up the two sides of Velcro® and install your:
Frugal Baby Computer Protector TM!

If the front of your computer is not flat, don't despair! Get a flexible cutting board from the Dollar store, or keep an eye out for some clear rigid packaging, that you can wrap across the front of your computer, and fasten with Velcro® dots along each side.
This time you will need the rigid plastic to be about 8.5" by 11" (or to fit your computer).
Place three Velcro® dots along each side of the shorter end of the plastic.
Then place the coordinating dots along each side of your computer front, to match the ones on your piece of plastic.
Then just line up and fasten one side, wrap around and fasten on the other side. There you go!
NOTE: This will not stop a determined troublemaker, but is very effective for most babies and toddlers who don't really understand the frustration turning off mommy's or daddy's computer can cause!
 Shopping Suggestions:
• Parent Units PC Guard Tower Protector
• Norpro Icon Cut N Slice Flexible Cutting Boards
• Velcro Brand Sticky Back Coins 5/8 inch 15/Pkg-Clear
• Safety 1st Power Strip Cover
• Mommy's Helper Power Strip Safety Cover

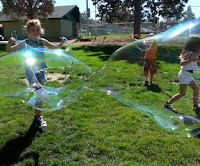
Cover your hands with bubble solution.
Then place your hands together as if to form a cup, leaving a small opening at the bottom.
Hold your mouth about one foot above your hands, and BLOW!
Homemade Bubbles
• 1/2 (500 ml) cup dish-washing liquid/soap
• 4-1/2 (4.5 liter) cup water
4 tablespoons (60 ml) glycerin
Measure out the water, detergent, and glycerin into a container with a cover and stir gently.
Note: The longer you let the mixture set, the larger the bubbles are and the longer they seem to last.
Thanks to Catherine for this Frugal Baby Tip!
More Bubble Ideas:
 |
| Giant Bubble Maker |
Have you ever made giant bubbles? How fun!
Here is a DIY giant bubble wand tutorial
Giant Bubbles Recipe
• 6 cups water
• 1 cup Karo® Light Corn Syrup
• 2 cups (16 ounces) clear dish-washing liquid/soap
 |
| Ultra Bouncing Bubbles |
Can you make bubbles bounce?
I wonder if I made this if my dogs would appreciate it as much as kids might?
• 1 cup distilled drinking water
•1 Tablespoon dish soap
•1 Teaspoon of glycerin
•1 straw (this is just what I chose to blow the bubbles with, I'm assuming you can use a typical bubble wand)
•1 clean glove (or sock) - (this is to keep the bubble from popping)
Mix all ingredients together and let sit for 24 hours.
Recipe thanks to PlayAtHomeMomLLC.com
 Snake Bubbles
How fun would it be to make snake bubbles!?
This craft is so easy and I bet you already have all the supplies in your house.
All you need is a plastic water or juice bottle.
Cut off the bottom, cover the raw edges with duct tape, dip in bubble solution and BLOW!
Have a contest to see who will make the longest snake!
Idea and photo credit: A Couple of Craft Addicts
All rights reserved
 Shopping Suggestions:
• Palmolive Ultra Soft Touch Dish Liquid
• Heritage Store Vegetable Glycerin
• Ecover Grapefruit and Green Tea Dishwashing Liquid
• Karo Light Corn Syrup
We sleep all together in a family bed.
I have always just folded up a flannel receiving blanket in fourths and put it under baby.....
When they got older and were potty training... I put the rubberized crib sheet under their portion of the sheet and cover that with the folded up blankie.
Makes the
leaksless devastating to the night.
Plus... remember I have had waaaaaaaaaay more leaks with disposable diapers than with cloth diapers...
In fact, that is when I started using this blanket thing was when I was using disposable diapers.
Thanks to Elke for this Frugal Baby Tip!
![King of the Kitchen [36/365] by Gabriella Corrado, on Flickr Image: King of the Kitchen, by Gabriella Corrado, on Flickr](https://blogger.googleusercontent.com/img/b/R29vZ2xl/AVvXsEiEIQKCrMIEoUJR5Tzw-lZ6sVPrFOImGs23CUNE1b04YteYOE5uT4u_eBTYu_Ls1EY5aayQ3JmnyTSHYrOLLwUPss6eY4RwvmmjWQ6SWahRC-zCLqEUWkwQ6X3IPz4i8toq7srt/s640/King_of_the_Kitchen.png)
When my boys were little, we didn't have any door handles on our lower kitchen cabinets.
I just hooked a bungee cord from the door at one end, across the front of all the cabinet doors, to the door at the other end.
My son couldn't get in!
Thanks to Betsy for this Frugal Baby Tip!
NOTE: Some children might still be able to undo these cords, and they could snap back - so it is always best to monitor your child, do not leave them alone in the kitchen.

Shopping Suggestions:
• Keeper 10" Bungee Cord
• Highland Fat Strap Bungee Cord Assortment
• Kiscords Safety Cabinet Locks
• Mommy's Helper Safe-Lok Cabinet Door and Drawer Lock
• Magnetic Cabinet Locks
• Dual Action Multi Use Latches
 Here are some quick and easy baby gift ideas:
If you can crochet, you can either buy flannel, burp cloths or ready-made receiving blankets, and finish the edge with crochet.
You can make a double layered receiving blanket just by sewing two together along the serged edge.
You can trim a receiving blanket with lace, ribbon, etc. for a beautiful finish!
More Receiving Blanket Ideas!
• How to Sew a Receiving Blanket
• Receiving Blanket with Matching Burp Cloth
• Reversible Flannel Receiving Blankets with Decorative Stitching
• Crocheted-Edge Blanket Tutorial
• 5 Crochet Edges You Should Know
And more baby gifts to make:
• Homemade Baby Gifts to Make
• Tutorial: DIY Lovey Tag Blanket
• Sew an Easy Beginner’s Baby Quilt
• 25 Fabulous Free Baby Sewing Patterns

When old cloth diapers, receiving blankets, or terrycloth towels wear out; cut them into squares and serge or sew around the sides.
Or just buy some inexpensive washcloths!
Then put them in a Tupperware container or old wipes tub or a ChangePal.
Add a recipe for home-made baby wipe solution.
 |
| Portable Diaper Changing Station |
You will have reusable wipes that are super soft, and last forever.
- Baby Wipes Recipe -
• 1 1/2 - 2 cups distilled water
• 1/4 cup Aloe Vera gel
• 1/8 to 1/4 cup olive oil (use extra virgin so there are no chemicals)
• 2 tsp. Baby Shampoo
• 2-3 drops Tea Tree oil or Calendula oil (optional)
• 2-3 drops Lavender oil (discourages molds)
Mix this solution together, use to wet your recycled wipes
Thanks to Maggie Atkinson for this Frugal Baby Tip!
Popular Posts
-
Would you like to prevent your toddler or pets from unrolling the entire roll of toilet paper, and stuffing it into the toilet, or trai...
-
I know many of us like to go organic, but I have found the best thing for those yellowy stains on baby clothing, cloth diapers and other f...
-
Aching breasts? Need some relief? Cut out four 6 inch circles of a soft 100% cotton (prewashed) fabric, such as cotton knit, flannelette...
-
National Paper Airplane Day -- Paper airplane day celebrations typically include social gatherings at which participants create and fly p...
-
Well, after Sarah leaked out of a disposable diaper Friday night, I knew I could no longer put off making her a pull-on fleece diaper cov...
-
OK, I am NOT very good at explaining things, (I'm a very visual person) so please forgive any confusing directions and feel free to a...
-
The dollar store often has has drawstring nylon bags or pop-up laundry baskets, by the laundry stuff. I paid less than $3.00 each, and I ...
-
Do you want to make wool soakers or diaper covers for a baby, but you are a crocheter, not a great knitter? I found a few patterns, and I a...
-
Your baby needs to nurse, but you are out in public and you are uncomfortable about showing off all that skin when you lift your top? Lay...


Recent Comments